Hi everyone! So here I am again to explain how I made a half slip that will be used to add length to my June Wrap dress. I am calling it an underskirt. Earlier, I wrote up a post about it but had to take it off the blog temporarily, for I made a mistake during the drafting process and I didn't want you to be led down the wrong road. So what did I exactly screw up? It was the widening of the waist. I didn't widen the waist enough to allow the underskirt to slide over my hips when I tried to put it on. Yeah, sounds like an obviously step to make but I completely overlooked it! Don't you just hate when that happens?
This was especially disappointing news to me, because I already cut the skirt out and sewed it together. I didn't realize my mistake until I started working on the elastic waistband. Nonetheless, I did manage to make the underskirt work; I simply inserted a side zipper.
So the original post is back, but revised. I changed some of my figures to match what I should have done. So without further ado, let me present to you the new and approved "A New Way to Add Length to a Dress -- Part 2."
--------------------------
In my
previous post I mentioned about a polka dot dress, called the June Wrap, I bought last year which was
designed by my eldest sister. When it was available at Christa-Taylor (an independent clothing store that went out of business in 2010), this is what you would have found on their website:
It also came in three other colors:
Sorry about the small image. . . It was the only one I could find!
My eldest sister has the green one and my younger sister chose the black.
-------------
And because the dress hem falls above my knees (a length I don't like much), I am going to add length to the dress
without altering the actual dress. How can this be done?
By making a half slip of course! I made a half slip with some slippery, taffeta lining and sewed a long strip of similar polka dot fabric (similar to the dress, that is), to the bottom portion of the slip. The dress will appear to have an intentional bottom layer near the hem. I suppose you can call it an
underskirt.
My Plan. . .
I want to share how I made this underskirt of mine but I will need to do it in separate posts. A four part series of posts would be the easiest for my to write and for others to read. It will go something like this:
2: How I made my underskirt pattern (this post)
3: How I sewed it together (upcoming post)
4: How to make an underskirt for any skirt or dress (final post)
--------------------
So let's begin Part 2 of the "A New Way to Add Length to a Dress" series:
Preparation -- As you might have noticed, the June Wrap has a full skirt so making a slim slip is not a very good choice. Unless, of course, you were interested in mimicking this specific style:
For my situation, I wanted a slip that was as full (or more) as the actual dress itself in order to make it appear as one with the dress.
So I measured the hem width of the June Wrap with my tailor's tape and came up with 106". This is approximately how much hem width I wanted for my slip.
Now I needed a basic skirt pattern to work with. I first thought of using a skirt sloper--a basic pattern that is used in pattern drafting--that I have and
used before, but I would have needed to add a terrific amount of fullness to this pattern; not something I really was up to doing. I decided to hit the ground running by starting out with a full Simplicity skirt pattern that I own. Out of Print 9926 to be exact.
Version 2 of this skirt has two patterns pieces: FRONT and BACK. And each of these pieces has a center line that is placed on a fold. It also has a hem width of 75-1/2".
106 - 75 1/2" = 30 1/2". So 30-1/2" is the amount of fullness I needed to add to the Simplicity Pattern (SP). Not much was needed, thank goodness!
But before I got down to the actual pattern altering part, I needed to make some suitable pattern making paper. Sometimes I use
pattern tracing material but this can get expensive when doing large scale patterns, such as a full skirt. That is why over the past couple years I've been saving the paper used in packaging that I find in UPS or FedEx boxes. I have a large wicker basket full of this paper!
I use masking tape to combine sheets because I can easily make a pencil mark on the tape, unlike scotch tape.
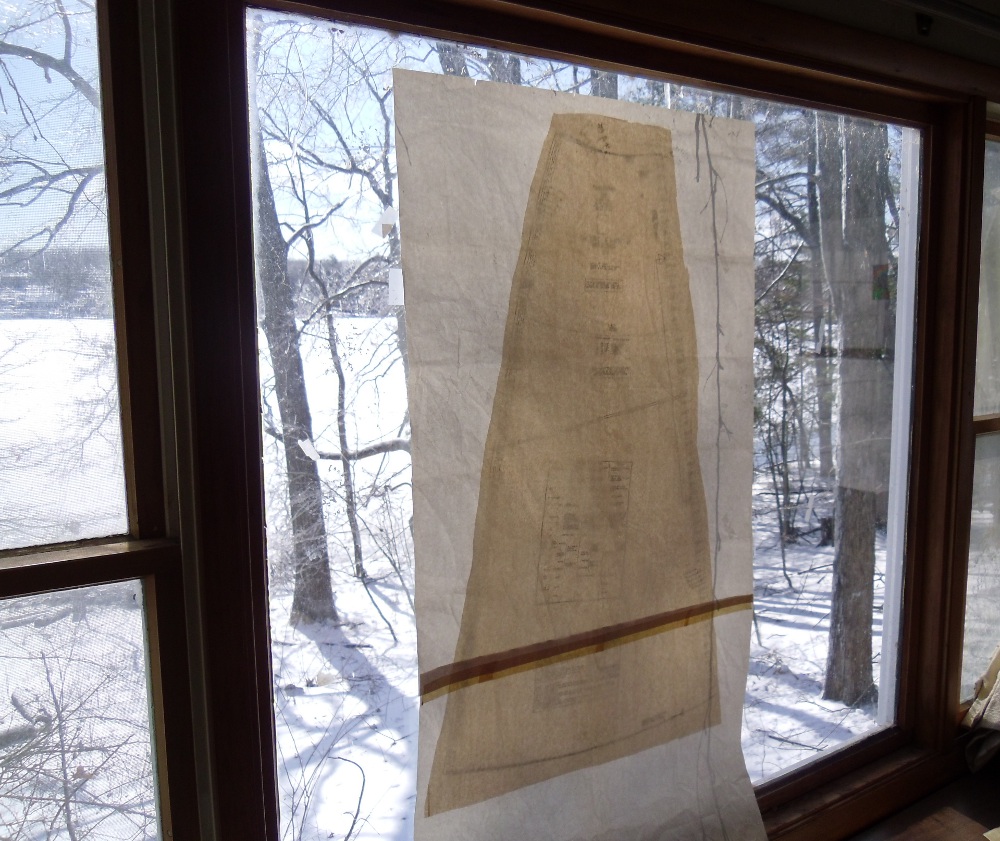
Using this type of paper has its drawbacks, though. The first being the paper's opaqueness; you just cannot see through it well enough to trace anything that is beneath. My solution? A bright window.
I taped the original pattern to a window:
Taped the recycled paper on top of this:
And traced away!
If you don't have a bright window available, try using a light table.
Adding Waistline Fullness -- Now it was time to make the alteration. I first traced the FRONT and BACK of the SP onto my recycled paper. The SP has 5/8" seam allowances included, so I removed them at this time. And I made sure I transferred all the necessary markings and information to my pattern.
The SP has a fitted waistband but I wanted an elastic one for added comfort. In order to do this I needed to add ease to the waist area to allow the elastic to stretch. 3" ease is all I needed. But I needed to add more fullness in this area to allow the underskirt to be slipped over my hips when I am putting it on. Since my hips are 39 and my waist is 30, I needed to add around 9" more. 9" + 3" = 12" total.
Since the whole object of this pattern alteration was to add fullness, I simply added 3" to the centers FRONT and BACK.
Why 3"? Both the FRONT and BACK pattern pieces are cut on a fold, so a mirror image of them will be produced once cut. So when I added 3" to the center fold of the FRONT, I am actually adding 6". Doing this to both pattern pieces results in a total of 12".
Adding Skirt Fullness -- Once the waist was taken care of, it was time to add fullness to the skirt. Since I already added 12" of fullness while altering the waistline, only 27-1/2" more was needed. (30-1/2" - 12" = 18-1/2".)
But how much fullness do I add to the skirt's two sections: front and back? By dividing 18-1/2" by 2 I arrive at 9-1/4". OK, that was easy, but I needed to do some more figuring. As I said earlier, the skirt has two pattern pieces, the FRONT and BACK. Each of these pattern pieces are half of the skirt's front and back, respectively. Mirror images, remember?
So half of 9-1/4" needed to be added to each pattern piece. 9-1/4" divided by 2 = 4-5/8". So I added 4-5/8" to the FRONT and again to the BACK.
How did I add fullness? The alteration method I found in
Make Your Own Dress Patterns, has you cutting slits into the skirt pattern from the hem to a couple inches from the waist. This method goes by the name of slash and spread.
Here is an excerpt from the book:
As you can see above, the skirt is divided into four equal sections and then cut. After which, it is spread out so that the fullness is distributed evenly. The gaps between the skirt sections have to be equal and the gap at the center line (which is typically the fold line), has to be half of this. (See figure C.) The gaps are shown as the fuzzy area.
So I divided the skirt into five equal sections. I chose five instead of four because of accuracy's sake. How did I divide evenly? I measured the length of the waist and divided that number by 5. I repeated this at the hem edge.
A little tip for you. . . To make those long slash lines on your pattern, divide and mark your hem edge and waist edge first, connect your marks with tailor's tape, draw dots along the tape edge, and connect these dots with a long ruler, or in my case, a clear, rotary cutter ruler. See below:
Now it was time for me to cut along the slash lines:
And write down the necessary info on my pattern tracing:
Next step: spread the pattern and add fullness. When I first tried out the slash and spread method a couple years ago, I couldn't figure out an easy way to spread the skirt sections evenly. But in time I figured it out, it just requires a little bit of algebra.
For my pattern piece, there are four gaps between the skirt sections. I need to position the skirt sections to make the gaps even, add half of this amount to the center fold, AND make sure I add the right amount of fullness (4-5/8") to the hem. Below is a little diagram I drew for clarification. The numbers are make-believe, they do not pertain to my real pattern.
A lot to factor in, huh?
To figure the distance between each skirt section as well as the center fold, I formed the algebraic equation below:
4x + 1/2x = 4-5/8".
"x" is the distance between each skirt section and "1/2x" is the center fold mystery number.
After solving the equation, I came up with the number 1.027. Yeah, lovely number to work with a ruler, you're thinking. I just rounded this number to 1" to make it more compatible. There are times in pattern drafting and alteration when preciseness is key, but with a full skirt, a ".027" won't hurt!
So that was how much distance between the skirt sections. But what about the center fold? Simple! I just divided 1" by 2 and came up with 1/2".
Now it was time to start drawing the new pattern. This is the part where the slash and spread method really shines. I can use the skirt sections as my guide in drawing the new hem edge.
Before I did cut out my new skirt pattern, I noticed the hem edge wasn't curved just right, so I went in with a colored pencil and trued the curved line and made slash markings over the first. It is important that you remember what is your old line and what is your new. That is why different colored pencils and the habit of slashing the old lines, really helps.
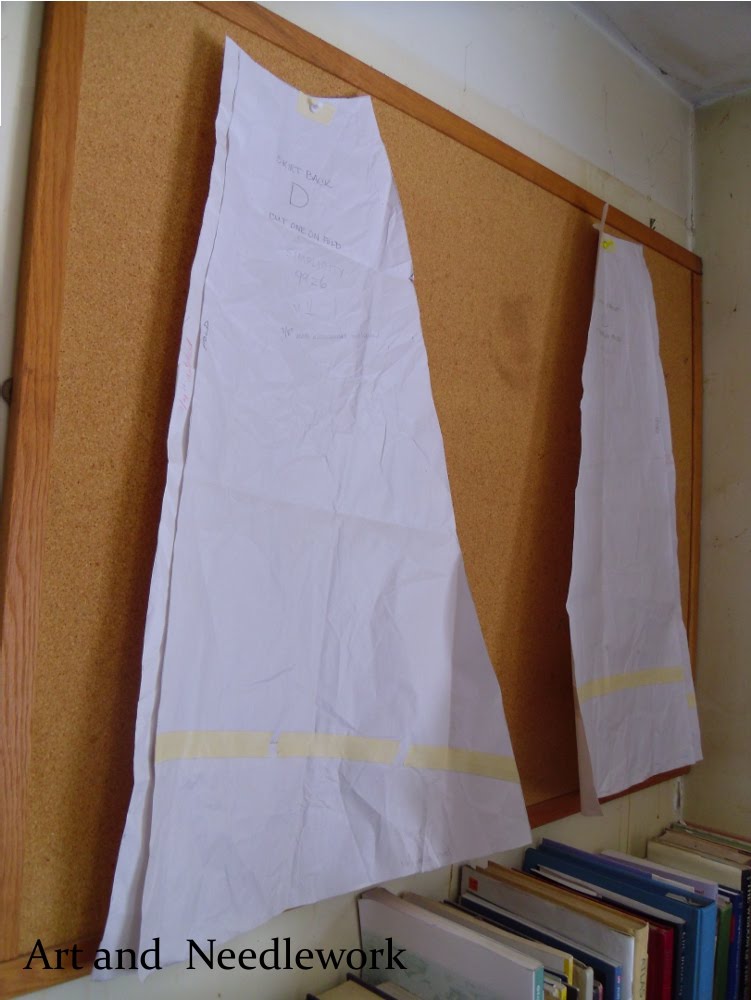
And the final step before cutting: adding 5/8" seam allowances to side seam and waist edge:
Ta da! The full skirt pattern that will produce a 106" hem width. Awesome!
But the ride wasn't over yet. I needed to make a lower panel pattern for the polka dot fabric that will match my June Wrap.
First thing I had to decide is: where did I want the polka dot fabric begin? I knew I wanted the taffeta lining fabric to be completely hidden. . . So about 3" above the hem of the June Wrap. That means the polka dot fabric needed to be around 8" wide.
So I measured 8-5/8" up from the skirt's hem edge and drew a line.
I needed to do 8-5/8" instead of 8" because of the 5/8" hem that was included in the Simplicity Pattern.
And here is my lower skirt panel pattern:
After it was cut, I added seam allowances to both the skirt's lower edge and the panel's upper edge, for they will be sewn together.
Am I done? Not just yet! There was one more alteration to do before all was said and done. I needed to widen the waist seam allowance to 1" for the elastic casing I was planning on doing. So I added 3/8" to the top edge.
Okey doke! That is it for the 2nd installment of the "A New Way to Add Length to a Dress" 4-part series. Did I cover everything well? Do you have any questions on what I did?
Remember to stay tuned for the 3rd exciting episode--how to sew it together!
Jump to the other parts of this series:
Labels: dress, sewing, underskirt