Here's my first post. . .
So where do I craft? I don't think I've wrote about this subject before, have I? This is quite a remarkable overlook on my part because I LOVE reading and looking at the crafting spaces or rooms that other people share via the internet, magazines, and books. I could pore over crafting spaces for hours if there were enough hours in the day.
In my part of the world, I have a designated room in my house just for crafting. For as long as I can remember we've called it the 'sewing room', and it has been used for just that for about 20 years. It is right off our dining room--which is connected to the kitchen--so it is easy-peasy for me to cook something and sew at the same time. Awesome! It is a 8-1/2 x 11 foot room and it was used as a nursery at one time. There is certainly evidence of this. . . The baby wallpaper still hangs!
I just wanted to state here that, yes, it may be true that I do complain a good deal--just ask my family--but I am very, very grateful for many things; having a sewing room is one of these. Being able to organize the room the way I want it to be, having the ability to leave my projects strewn about the room, and having the work space to create is so wonderful! A lot of good memories are in this room and if I ever had to live in a different house, I wish I could take it along with me. :)
I thought it would be fun to talk about my sewing room over a couple posts. So for this segment I will be discussing the closet that contains all my fabric. The closet originally had folding doors on a runner, but I removed them a couple years ago because they malfunctioned 2 times out of 3. Now it is sort of a fabric nook with a large wooden dresser. The dresser was bought by my grandmother decades ago and it has a little secret. OK, maybe the secret is an obvious one. The drawers do not slide in and out well at all. They do serve their purpose. . . But for only those who have the knack. It took me a couple weeks to master it! Here's a photo:
My sewing nook
So let me briefly run you through the photo above.
- The two top shelves above the dresser hold fabric that I don't use often or do not have a real plan for. My younger sister just went through all that fabric and separated them into same-color piles. Thanks, sis!
- The shelves to the right of the dresser hold large pieces of fabric, most of which have a project in mind.
- On top of the dresser there are scrap fabric containers, my knitting needles, buttons, and a sewing basket.
- To the left of the dresser I house my lengthy fabric and quilt batting on long cardboard tubes, (the tubes came from wrapping paper).
- And inside the dresser? Yep, more fabric.
Let's take a closer look
Inside the dresser drawers I store the fabric neatly folded and stacked in such a way so that I can easily spot a particular piece. I also keep all like-colors together; reds with reds, blues with blues.
On top of the dresser I placed my fabric scraps, knitting needles, buttons, and sewing basket. On the back wall I hung a small bulletin board which I usually post my knitting gauges on:
The fabric scraps are wrapped around cardboard and secured with a rubber band before they are housed in two glass containers that were given to us by a neighbor. The containers use to hold seashells. Oh, don't think now that these are my only scraps! I have two large boxes some place else!
My straight knitting needles are standing tall in their white, plastic containers. The containers are recycled; they use to hold Country Time Pink Lemonade:
The button jar is just plain fun. I originally kept all my buttons in a large plastic bin but I thought I needed some sewing "eye candy" in the room. Button jars always supply the candy!
The sewing basket that sits besides the button jar isn't used often but I've always thought it stood as the pinnacle of true sewing nostalgia. Every time I look at it, I want to go and search for a cross-stitch project.
The shelves to the right are, to me, the most functional shelves in the whole room. The fabric sits perfectly on them and I can always easily see what I have.
Now a tip for you.
It may sound like a superficial and minor detail in fabric storage, but I think knowing how to fold and tag your fabrics is extremely helpful in keeping things organized. Let me show you what I do with leftover fabric from a sewing project.
OK, here's some polka dot fabric leftover from my most recent project. Currently it is, what I like to call, a mess.
Complete with long, narrow strips and separate pieces.
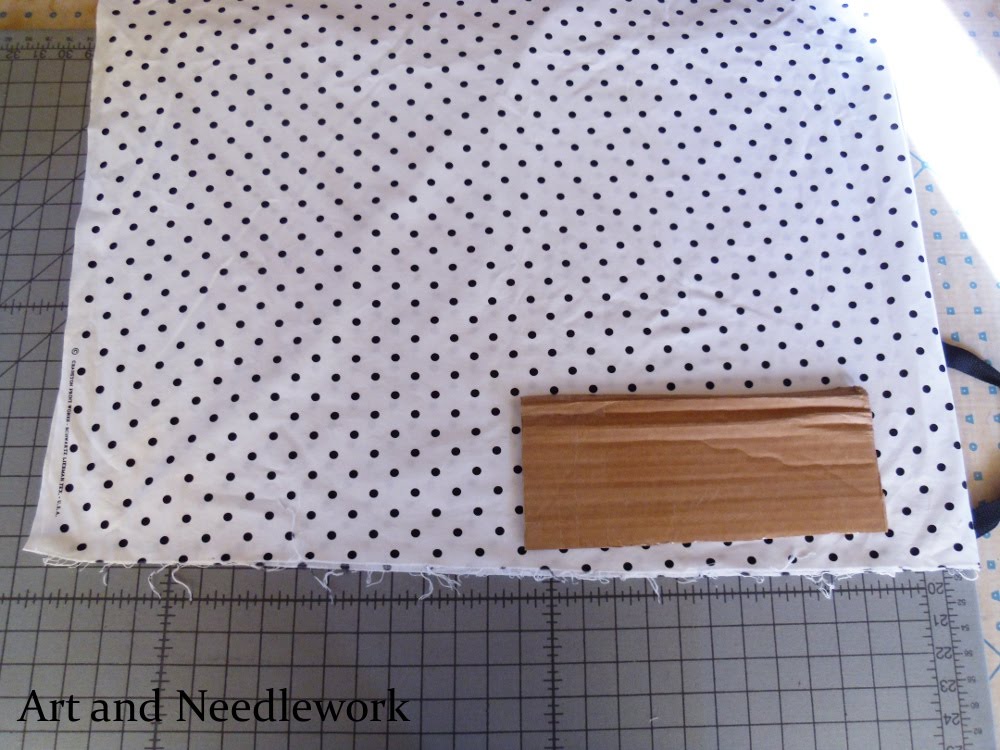
Find a piece of heavy cardboard, (I used a shipping box), and cut a 12" x 5" rectangle. Also find a rubber band.
Try to fold the fabric in half the best you can:
Uh oh, way too wide for my cardboard:
If this is the case, fold lengthwise until the width is roughly the same as the length of the cardboard:
Now start folding and piling up the fabric to one side, leaving a flat and smooth area away from you.
Place the cardboard near the edge of the area where the fabric is piled.
Start rolling!
Now you have a neat little fabric package.
And don't forget to secure with a rubber band:

Want to make sure you know the history of your fabric? Try attaching a little tag to the selvage, (or other inconspicuous area), with a safety pin. On my tag, I attach the fabric store sticker and say if it was pre-washed or not. I've found the fabric store sticker to be extremely helpful in figuring out how much yardage I bought and also to see the Item No. Good things to know if you want to purchase more later!
Well, that is how I do fabric storage. How do you store your stash and what do you do to stay organized? Share your tips!
Labels: my sewing room, sewing


