Wanted to come by earlier to write about my muslin endeavors for my 1940s dress I'm making for
the sew-along, but another sewing commitment diverted my focus. Will tell you all about this other sewing project at a later time, because in all honesty, it deserves a post
or posts for itself!
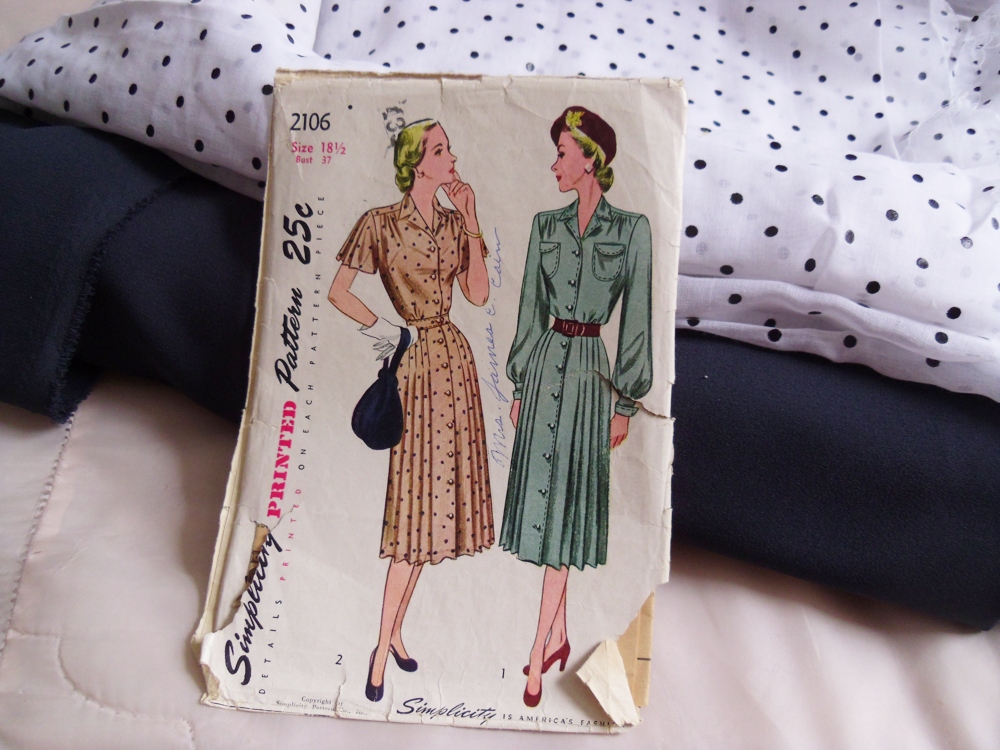
Just to help you remember my plan, here's the pattern and fabric I am using:
So let me bring you my muslin, done up in a cheery, striped pink fabric, who in a previous life, was a bed sheet. Make do and mend!
No, I'm not wearing it. Why you ask? Because it fits great and there's no need to ask for fitting advice. (Yeah, if I can avoid posting a muslin with me in it, I will.) I don't know how it happened but it did, and I'm not complaining. Everything was easy to sew together, too. Surprisingly, the pleated sleeve took me no time and I love how it looks:
The muslin fits great but I did make some initial alterations to the tissue pattern. They're the normal changes I make to almost every pattern I use: (1) add 2" of length to the bodice and (2), add 1" to the waist width, or in the case of this dress, the inset belt, whose construction resembles a waistband:
When I first put on the muslin one thing did stand out to me, and that was the shoulders. Too much excess fabric at the shoulder, causing vertical folds to fall down in the area between the neckline and armhole. It soon dawned on me that an integral part of this muslin was missing. Could it be the shoulder pads? You know, that quintessential 40s garment add-in that I'm sure Joan Fontaine and Barbara Stanwyck didn't leave home without?
I didn't have shoulder pads on hand so I slipped some polyester batting scraps under the shoulder while wearing the muslin, and the shoulder looks perfect. Up until today, I was planning on eliminating the shoulder pads from this dress and altering the shoulder and sleeve cap to remove the extra ease. But after playing around with my makeshift batting and reading about how I can make my own pads (make do and mend. . .), I believe I will stay true to the era's love for straight shoulders and the pads they used to achieve this look.
What's up next for me? I could go straight for the fabric cutting but I want to do two things first. Number one is make the shoulder pads. It's a new thing for me so I would like to get that out of the way! After that I will trace the original pattern tissue onto some sturdy, brown packing paper. Ah, packing paper. . . The poor man's Swiss Tracing Paper! I don't mind using it, really, and I feel more at ease when I'm doing my alterations. I feel like, "Who cares if I use four yards of it. . . It doesn't cost a thing." Now, if only Amazon.com can stop using those air packs for packing; I need more paper! ;)
Labels: sew for victory, sewing