I love quilts. Everything about them brings pleasant thoughts and memories, and for me, something that can be used everyday to keep someone cozy, is something very special. My mother spent many hours making quilts and I remember well the duck pillowcase she hand quilted while we watched tv during the evenings. I still have all her thimbles.
Another great thing about quilts is their endless design opportunities. All those different quilt squares, the fabric choices, and the machine or hand quilting designs. . . My goodness! It's almost overwhelming. That is sort of how I felt the beginning of last week when I was trying to decide on a quilt design for my own quilt. Yes! A quilt for my twin sized bed!
I've made two quilts during my on-and-off quilting career. I made a small purple baby quilt using a design from the Sweet and Simple Baby Quilts book by Mary Hickey. I think that was back in 2006? And then in 2009 I made a twin sized quilt for my sister Bernadette's bed. Since then my quilting adventures have laid in simple, quick projects like potholders and a recipe binder cover.
So after perusing some of my quilt reference books and some online sources, I found this craftsy.com project:
A simple quilt, yes, but I love it! Just a culmination of half squares laid in a certain way to form a radiating diamond pattern. Now that's something I can do.
The color scheme I'm using is green and purple. I bought a large amount of green cotton fabric at a yard sale two years ago and this green stash has been my main inspiration. The idea of adding purple came a little later when I talked about quilt colors with Catherine (my sister) and Mary, who blogs at The Quilting Bibliophagist. As I make more and more squares I'm liking this color plan more and more.
{ some quilt design sketching I've been doing }
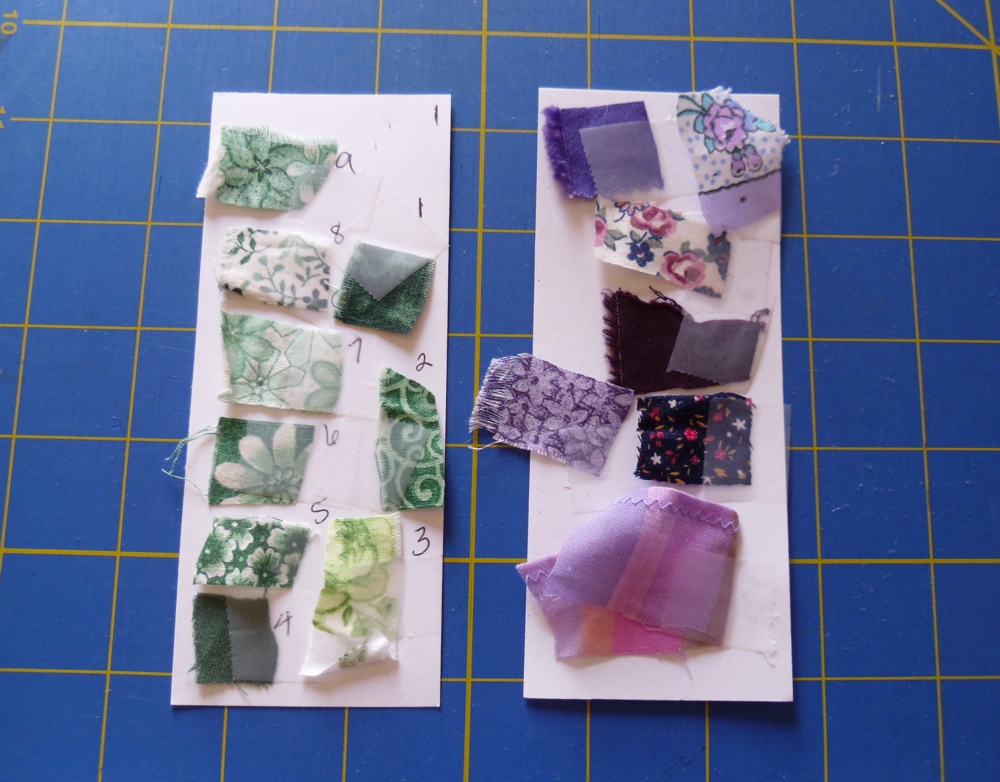
{ the fabrics I've selected }
Construction:
So for this quilt I am making 192 blocks: 16 blocks by 12 blocks. The blocks will have the finished measurement of 5" so the finished quilt (without borders and binding), will be 60" x 80".
I make the blocks by cutting a 5-7/8" square and cutting it in half diagonally. I then sew a colored triangle to a white triangle.
I haven't decided on a couple features as of yet. Such as, what color for the binding, what fabric for the backing, and if I am going to go beyond just stitching in the ditch. Have to sort those out. . .
---------
So where am I at? So far, I've made 92 blocks. Not bad for only working on it for two days! The first day (last Sunday), I felt like this quilt was one monstrous task. But as I got into it more, a lot of the steps became mechanical. It reminds me very much of knitting, especially when knitting without a pattern. I may have 100 more blocks to do, but really, I'm looking forward to it!
I won't to show you what I've been using to stay organized while this quilt comes together. You see, I have this wooden sewing caddy:
Yeah, you probably have one yourself if your grandmother sewed! Well, up to this past Sunday I haven't been using this caddy. (Namely, because it is hard to expand the enclosed shelves in my tight spaced sewing room.) But as I was looking around for a solution to storing all these quilt blocks, I thought of this caddy, which was nestled under my ironing board. I pulled it out, dusted it off and here it is with the blocks:
And I have been keeping the different blocks separate by way of a safety pin that's anchored at an edge or corner:
Keeps everything nice and tidy.
The best part about this storage solution I came up with is: I am finally using the caddy. After this quilt is done, maybe it would be a good place to store fabric scraps? Have to wait and see!