It has finally arrived! Brand new pics of a brand new finished project: a flowy a-line skirt done in a bright and cheerful red floral print. So here it is. . .
 |
| { side view } |
 |
| { back view } |
 |
| { piping } |
 |
| { inseam pockets } |
 |
| { the skirt being worn with flats } |
Isn't it so bright and fresh?
The Skirt's Features: This fully-lined skirt features a wide waist yoke, inseam pockets, an invisible zipper situated at center back, and piping, which runs along the waist yoke seam.
The Fabric: I made this skirt for Catherine using fabric I bought at a yard sale last year for $3--and I have leftovers. Oh, I love that! The fabric is a medium weight cotton (probably was going to be used in a quilt), and the lightweight lining is 100% polyester, which I bought from fabric.com in 2010.
The Pattern: This skirt was loosely based off of Simplicity 9926.
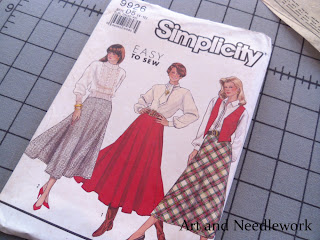 |
| { View 2--farthest left--is the one I used ) |
I changed a lot with this 80s pattern, which belonged to my mother. I chose not to use the waistband pattern piece, I added a 2.5" wide waist yoke, lowered the waistline, added inseam pockets, and moved the side zip to the back. Really the only thing this pattern gave me to work with was a full, a-line skirt shape. I changed almost everything else about it. :)
The Construction Process: And for those who love the inner workings of garments (and I know I do), here are a few pics of the finer details.
 |
| { interior front } |
 |
{ interior back }
 |
| { public view of invisible zipper. I inserted the zipper the same way I demonstrated in my tutorial--without an invisible zipper foot } |
|
 |
| { invisible zipper on inside } |
 |
| { closeup of piping along waist yoke } |
 |
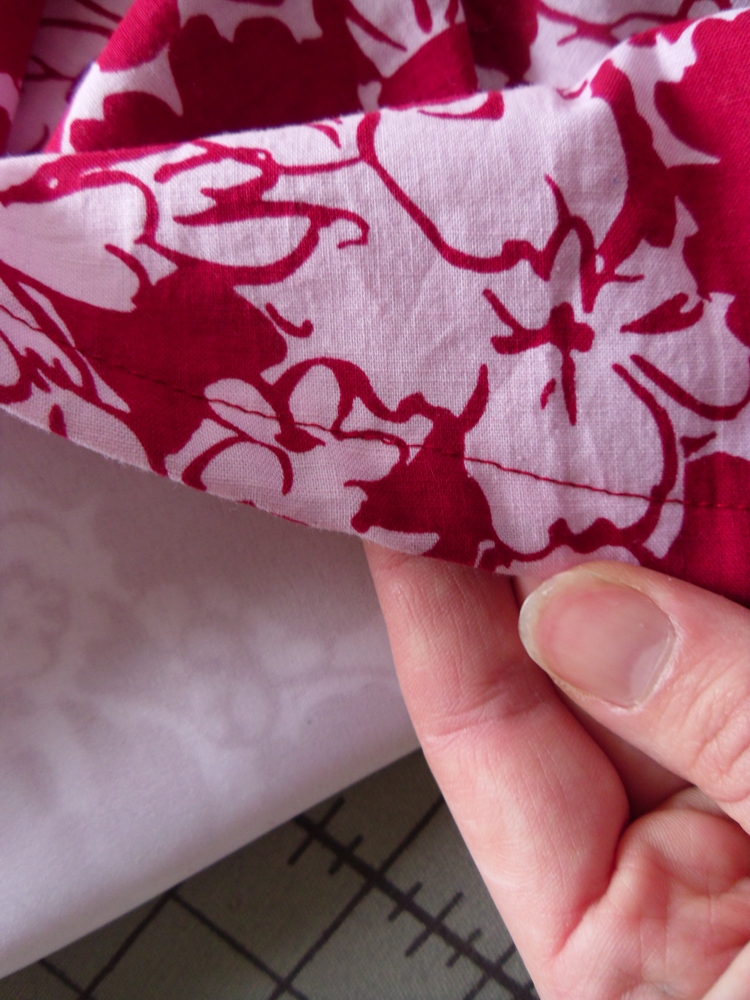
| { public view of hem } |
 |
| { interior view of hem. You can see that the lining and fashion fabric are hemmed together } |
 |
{ inseam pocket }
 |
| { waist yoke facing that has been finished with red bias tape } |
|
 |
| { waist yoke facing turned up to see inside seams } |
What I Did with the Waist Yoke: Typically when I sew a skirt with a waist yoke facing, I press the lower edge under 3/8" and slipstitch the facing to the seam. Such as in the case of my Green Summer Skirt. This time I decided to finish the raw edge using bias tape in a bright red. I really like this alternative! The only thing I'm questioning myself about is: should I have serged the raw edges of the bottom waist yoke seam, which is located right underneath the bias tape? (See last photo above.) I'm kind of worried that it isn't completely enclosed by the facing and will fray with a vengeance. But this seam is made up of three layers of fabric: skirt, waist yoke, and lining; would a ridge form? I probably will serge it the next time just to see what happens.
To help with any future waist stretching (which can be so annoying!), I stitched the top waist seam with a strip of seam binding. I would much rather have used 3/8" twill tape, but I used all mine up while sewing my pants. I haven't heard people using seam binding as a seam stabilizer, this idea was actually thought up by me. Have you ever used it this way before? Had good results? I don't see why it wouldn't be a good notion for the job: it does't stretch and doesn't fray much.
What I Did with the Lining: The lining was inserted differently this time. As I reflect on it, this skirt is partly lined and underlined. Yeah, I guess so. You see, the lining and the fashion fabric seams were sewn separately at the sides but together at the center back, right under the zipper.
Why on earth did I do this?
The lining I chose to use is very light weight and I was picturing in my mind the lining shifting and wrapping around the wearers legs. It just seemed to me from the get go that the lining needed to be anchored to the fashion fabric. I first thought of underlining the fashion fabric but that would make me lose the nice, tailored look of a lined garment. That's why I went with the idea of anchoring the lining only at one seam (the center back), and also hem both the fashion fabric and the lining fabric together using a narrow hem.
It worked out just the way I wanted it!
--------------
On Etsy. . .
I'm over the moon about this skirt. It came together remarkably well and I just love to see good results after heavily altering a sewing pattern. And just because I love making skirts like these, I'm thinking of selling them in my Etsy Shop in the upcoming weeks. The plan is to create "Made to Order" listings so that the buyer can choose the fabric and trimmings and give me their measurements. This way, I will be able to make them really special skirts that will have the proper fit for their individual shape. Sounds like a very exciting venture for me and I can't wait for the first order. I will post here as soon as I make my first skirt listing!
Labels: sewing, skirt