So here are all my notes whilst knitting:
January 2009: Prepared to knit vest by beginning a Knit Along on the group, Interweave Knitters. Check it out here.
I had a rather difficult time trying to match my sister’s size with the pattern’s sizes. She is right in between the patterns 34” and 41 1/2” sizes. I remedied the problem with help from one of the members of the KAL–MaryDenise. I wound up following the 41 1/2” size using my gauge, which is smaller compared to the pattern’s original gauge. So in a nutshell: I am knitting a smaller vest than what the instructions were meant to do. Pretty sneaky, don’t you think?
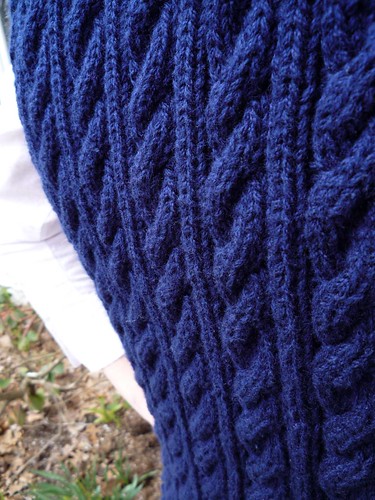
February 3, 2009: I have achieved to knit 3 1/2” of the BACK. This is my first time knitting cables and I am truly enjoying it! I thought they were going to be hard to do but I actually can have my thoughts wander and watch t.v. while I’m knitting. So as you can see they don’t take much concentration, they become natural to you in a matter of minutes.
February 5, 2009 Knitted 3 1/2” more inches of the BACK. Coming along…
February 15, 2009 I am shaping the armholes for the BACK. Oh, a side note…You’re probably wondering why I am using a circular needle when I am working the vest flat. I chose a circular needle rather than a straight because I find it more comfortable to work with (the knitting falls right in the middle of my lap rather than to my sides). So it is just a personal preference! I’ve noticed a lot of people choose to use them over straights, so I guess I am not the only odd ball!
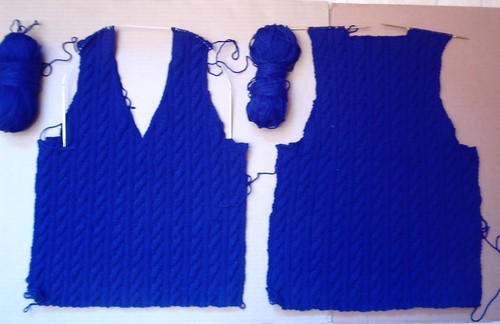
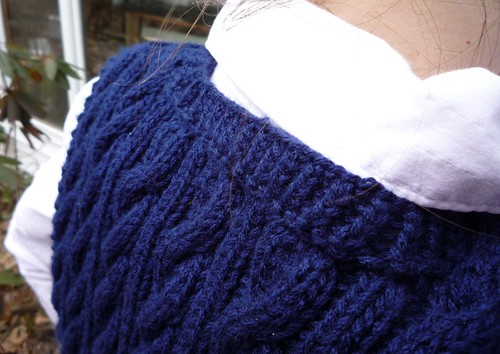
February 21, 2009 I am finished with the entire BACK and I placed the shoulder stitches onto holders. I didn’t place the middle stitches of the back neck onto a holder like the pattern said to, but rather, bound them off. I will pick them up later when I do the entire neckline. I believe that binding them off will give consistency to the neckline, since the other neckline stitches are bound off. It will also give durability.
I don’t use your typical stitch holder. My holder is a small double pointed needle that has two tiny rubber bands wrapped around each end to prevent stitches from sliding off. The makeshift holder works well so why not, right? :)
I’m going to cast on the FRONT today.
February 26, 2009 I am 4 inches into the FRONT now. Because the Lenten season began yesterday I will be spending more time knitting this vest. I am abstaining from watching t.v.! :) It is definitely a hard sentence when the Knit and Crochet Today show is waiting for me!
April 1, 2009 Didn’t have much time to knit during March but now I am back and have some updates to share. I am still working on the front and have reached the neckline and armholes (both are shaped at the same time). I had a very scary experience when I dropped a stitch right at the neckline! Since I have to decrease there it was rather difficult to pick it up but I made it through and it looks fine. Whew!
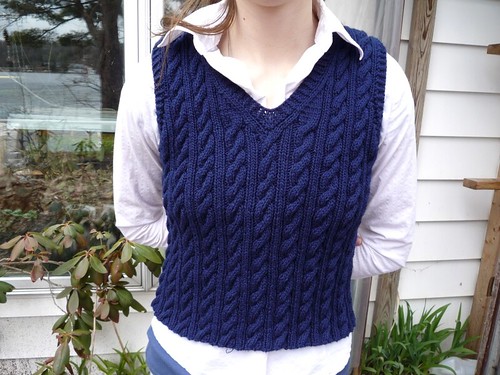
April 5, 2009 I am officially, indubitably, positively DONE. Yes, the vest is finally all in one piece and neckband and armbands are here, too. :) The last two days before I finished this vest I was working frantically on it. My mad dash to the finish line had nothing to do with the KAL nor the deadline. It all had to do with that little voice in the back of your mind that keeps on saying, “You’re almost done, you’re almost done…” I think every knitter has experienced this sensation one time or another, so you know what I am talking about.
So how did everything go with the knitting? There were no real “stuck” moments like I usually have when trying to decipher the instructions, all of it came to me with the help of my knitting dictionary.
There were many milestones for me with this pattern, too. This would be my first time to knit a vest, do cables, neckbands, armbands, decorative rib, and picking up stitches. So yeah, this pattern has really helped my advancement into the world of knitting.
What about the yarn? Scrumptious! Very soft and durable, no problem with it whatsoever.
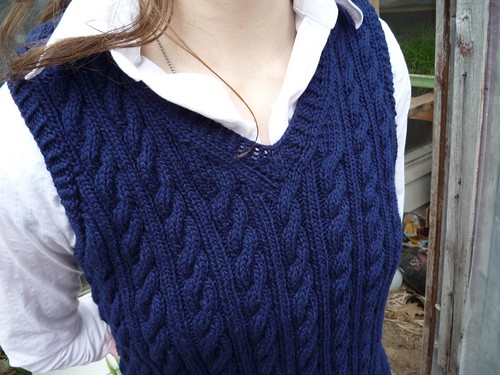
One last note. I said earlier that I bound off the back neck stitches rather than placing them on a holder. Well, I thought you would like to take a look at the finished neck so I took a picture of it. Look at photo #2 from the top.
No comments:
Post a Comment